Simple Beaded Wall Hanging Decoration In A Triangle Shape
Wooded chaplet may not seem similar much simply they're a very versatile resources when doing all sorts of DIY projects and crafts. There'southward even some projects that are specifically focused on making use of beads. A lot of them are decorations that yous tin can put up on your walls.
 View in gallery
 There's a lot of room for creativity and originality when information technology comes to wooden dewdrop decor pieces. Nosotros're going to explore such a projection correct now so check out this beaded wall hanging tutorial if y'all want to find out more than.
 View in gallery
 Materials needed for the wood beaded projection:
- wooden chaplet in dissimilar sizes
- 3 shades of green acrylic paints
- pigment castor
- wooden rod
- yarn
- pair of scissors
- wooden sticks/ skewers
 View in gallery
 How to craft this wooden bead wall hanging decoration:
Step i: Select a few beads in different sizes and push button the skewer through them
If you look at our final design, you'll run across the central strand of beads is quite unique. Information technology uses chaplet in four different sizes and information technology has a differ color than the residuum. And so get ahead and select the chaplet that yous desire to use for this section and push your wooden skewer through all of them. This is just so y'all can easily pigment them all afterwards.
 View in gallery
  View in gallery
  View in gallery
 Step ii: Pigment the chaplet light blue
Nosotros wanted these beads to have a low-cal blue color and then we went alee and painted them all while they were spaced out on the skewer. This is a nice and like shooting fish in a barrel technique that allows y'all to pigment the beads on all the sides without having to place them on a flat surface to dry.
 View in gallery
  View in gallery
 Step iii: Make two more strands of small beads and paint them turquoise
Using the aforementioned technique push your wooden skewer through some small-scale wooden chaplet and pigment them turquoise. It doesn't actually affair how many you paint at a fourth dimension as long yous have enough for your end design.
 View in gallery
  View in gallery
 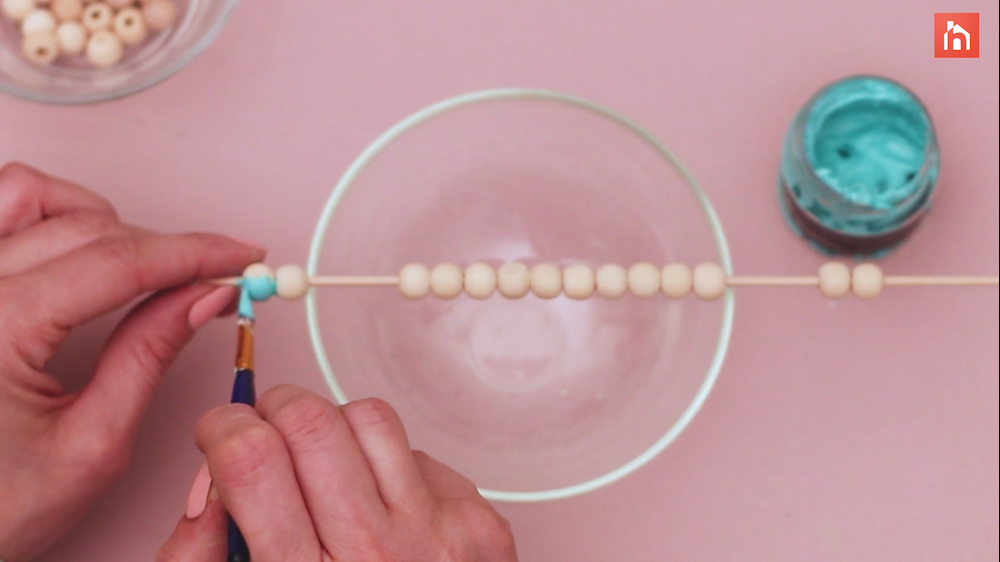 View in gallery
  View in gallery
 Step four: Brand four more stands and paint them dark green
Nosotros had a third paint color that we wanted to use for this blueprint, a prissy dark shade of green with just a hint of blue in it. These beads were meant for the shorter strands but we needed more of them since nosotros wanted two strands of green beads on each side for a symmetrical V-shaped design.
 View in gallery
  View in gallery
  View in gallery
  View in gallery
 Step v: Measure and cutting your yarn strands
While y'all're waiting for the paint to dry you can go ahead and set up all the yarn strands that y'all're going to need after on for this project. The blueprint we chose features 7 strands of beads then we needed 7 double pieces of yarn. We measured and fabricated all of them longer than they had to be just so nosotros had some freedom and flexibility.
 View in gallery
  View in gallery
  View in gallery
  View in gallery
 Step half-dozen: Put all the colored beads in a bowl
After the pigment on all the beads has dried, accept all the skewers and push the beads off of them into a modest basin. This fashion they'll all be in ane place and it will be easier for you to take hold of them.
 View in gallery
  View in gallery
 Step 7: Knot the yarn strands onto the wooden rod
Beginning of all, make sure you're happy with the length of your wooden rod, dowel. Cut it to size if needed. Then take the yarn strands that you prepared before and loop them around the dowel one by one, making a knot at the top so they stay in place.
 View in gallery
  View in gallery
  View in gallery
 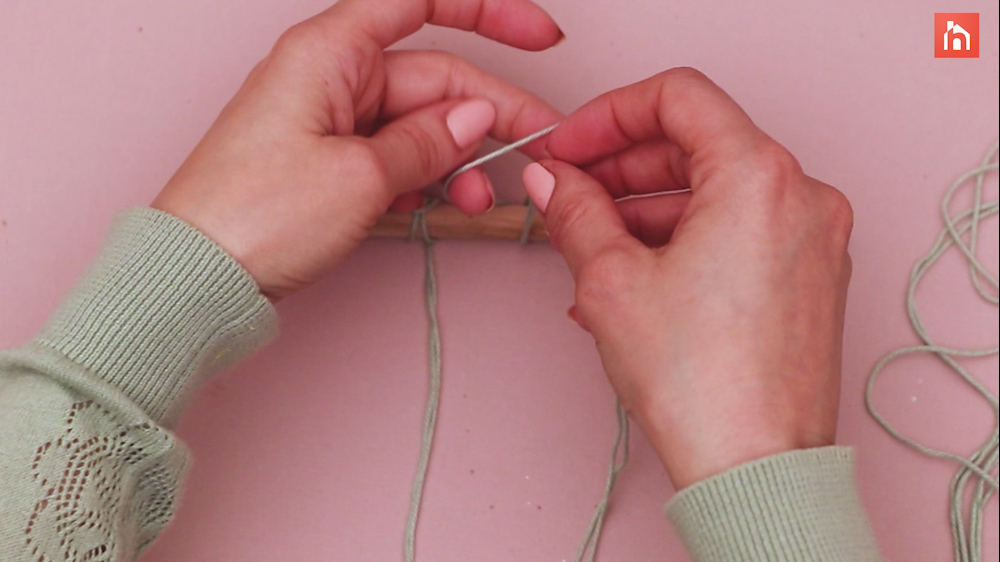 View in gallery
  View in gallery
  View in gallery
  View in gallery
 Step 8: Thread the lite blueish beads onto the central strand
Showtime with the strand in the heart and employ a needle threader so hands push the yarn through the needle. Then button all the beads onto the yarn in whatsoever order you desire. We chose to have the biggest bead in the eye and to take the rest decrease in size from that point. When all the chaplet are on the yarn, make a couple of knots at the bottom to preclude them from falling off.
 View in gallery
  View in gallery
  View in gallery
  View in gallery
  View in gallery
  View in gallery
  View in gallery
  View in gallery
  View in gallery
  View in gallery
  View in gallery
 Step nine: Echo the process for the residue of the strands
Now yous know to push all the chaplet onto the yarn strands and you tin repeat the aforementioned process for the residue of them. Mix and match the colors and sizes of beads however you want. We chose to have one strand of small turquoise beads on either side of the central strand and then two dark greenish strands on each side of those. The strands get increasingly shorter towards the edges creating a V shape.
 View in gallery
  View in gallery
  View in gallery
  View in gallery
 Step 10: Cut off the backlog yarn at the bottom
In one case all the beads are in place and you made all the knots, go ahead and cut off the backlog yarn at the bottom of each strand. It'southward up to you how brusque you want to leave it or whether or not you lot desire to add more details and ornaments like tassels for example. We chose to go on the blueprint simple.
 View in gallery
  View in gallery
 Step 11: Attach a yarn hanger at the top
In order to really be able to hang this wooden bead decoration up on a wall you also demand to make a hanger for it. Utilize some other slice of yarn for this. Wrap it around the ends of the wooden rod and secure it with knot, making information technology as long equally yous want.
 View in gallery
  View in gallery
  View in gallery
  View in gallery
  View in gallery
  View in gallery
  View in gallery
  View in gallery
  View in gallery
  View in gallery
 Source: https://www.homedit.com/beaded-wall-hanging-decoration/
0 Response to "Simple Beaded Wall Hanging Decoration In A Triangle Shape"
Postar um comentário